Microsoft did provide an alternative to end users for running Windows XP in Windows 7 known as 'XP mode', but have taken out this feature from their most recent release in the operating systems product line, Windows 8.
But as they say, 'When there is a will, there is a way'. Using XP mode on Windows 8 is also possible with a little tweaking. I will show you later in the post how to do that.
On Windows 7
For using Windows XP mode, the PC must meet certain system requirements. If it doesn't, XP mode would not work correctly even though downloading and installation process gets completed successfully.
PRE-REQUISITES
a) Is your computer Hardware Assisted Virtualization capable?
This tool can be downloaded from here. It can check whether your system is capable to run XP mode or not.
b) Is Hardware Assisted Virtualization enabled (if your computer supports)?
If your computer supports HAV, you may need to turn it on from BIOS. Check BIOS settings to confirm if this feature is enabled or disabled. To make XP mode work, HAV has to be enabled.
c) Your Windows 7 version must be Professional, Enterprise or Ultimate
Versions other than Windows 7 Professional, Enterprise or Ultimate are not supported.
HOW TO INSTALL AND USE WINDOWS XP MODE
- XP MODE
- Download and install XP mode from here and choose Get Windows XP Mode and Windows Virtual PC now.
- Select your desired language and specify your current edition of Windows 7 that is being run.
- Under Download and install Windows XP Mode, click Download.
- Once downloaded, run the downloaded file.
- In the Welcome to Setup for Windows XP Mode dialog box, click Next.
- Choose the location for the virtual hard disk file that Windows XP Mode uses, or accept the default location, and then click Next.
- On the Setup Completed screen, click Finish.
- WINDOWS VIRTUAL PC
- Go to the Windows XP Mode and Windows Virtual PC website from here, and then click Get Windows XP Mode and Windows Virtual PC now.
- Select your Windows 7 edition and desired language for installation.
- Under Download and install Windows XP Mode, under Windows Virtual PC, click Download.
- Once downloaded, run the downloaded file.
- Click Yes to install Update for Windows (KB958559).
- If you accept the license terms, click I Accept.
- After installation is complete, click Restart Now to restart your computer.
- USING XP MODE
- Click Start button, then All Programs. Click Windows Virtual PC, and then click Windows XP Mode.
- If you accept the license terms, click I accept the license terms, and then click Next.
- On the Installation folder and credentials page, accept the default location where Windows XP Mode files will be stored, or choose a new location.
- Type a password, type it again to confirm it, and then click Next.
- Click Start Setup. After setup is complete, Windows XP Mode opens in a separate window.
- INSTALLING & USING PROGRAMS IN XP MODE
- Install any program you would like to use on XP mode.
- Once installation completes, click Start button, click Windows Virtual PC. Then Windows XP Mode Applications, and then click the program you want to open.
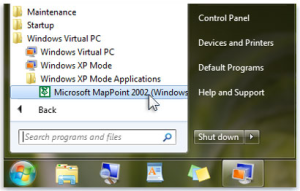
Note:
In XP mode, your physical CD/DVD drives will remain available and perform other operations like you do with normal installation of XP. Also, when a program is installed in XP mode, it will also appear in Windows 7 and you can open them directly from there.
On Windows 8
XP Mode was available for free to Windows 7 Ultimate and Enterprise users which gave them the option of running their programs in a virtual XP environment. It was almost as good as a physical installation (depending on PC configuration of course). Also, it was easy to use and most of the configuration was handled by the setup itself making it ready to use as soon as the installation completes.
For Windows 8, since this feature is officially unavailable a little tweaking has to be done in order to make it work. Steps are mentioned below:
- Download WindowsXPMode_en-us.exe from Microsoft's website. Before downloading it will ask you for validation which is necessary to download to check that the copy of Windows you are currently running is genuine.
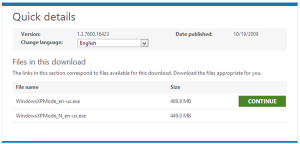
- Once the file is downloaded, use any archival tool (Winzip, Winrar etc.) to open the downloaded executable file as an archive.
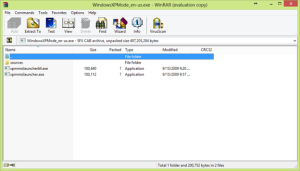
- Locate file 'xpm' under 'sources' folder and extract the 'xpm' file to your computer.
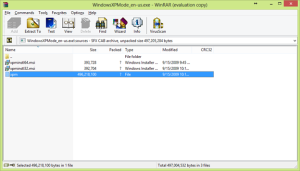
- If not automatically opened, select the extracted file 'xpm' and open it with the archive program (Winzip, Winrar etc.) Locate a file named 'VirtualXPVHD' and rename it with .vhd extension. (You may have to extract this file too if not automatically done by the archival software)
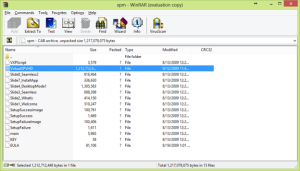
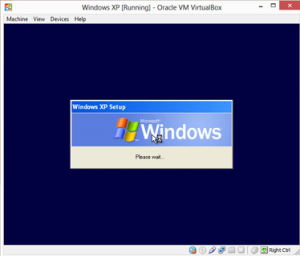
- Load this file (VirtualXPVHD.vhd) into any virtual machine emulator software e.g. VirtualBox and enjoy XP virtual environment in Windows 8.
Hope this helped. If you feel any section of this blog facilitated you in any way, do not forget to hit the like button.
I would be more than happy to welcome any comments and feedback on the content of this blog. If you think there is any particular topic or section you would like to see in this blog, drop me an email at sysnetadvisor@gmail.com.
You can also follow my blog by entering your email address on the right and you can receive email notifications for new posts added to the blog.
Stay updated!


No comments:
Post a Comment